Accessing Content in Axis LMS

Within Axis LMS, Online Courses can be as simple or elaborate as you require. Some courses are simple and completed by a user like a shopping list - just scratch them all off as they’re completed. Others are massively elaborate; revealing additional content within the course based on a user’s performance in an entirely different course. But before you can start accomplishing these feats of interwoven Course design, you’re going to need to understand the different pieces your courses are composed of, and how they affect on another.
The four main components you’re going to need to know about are
- Course Pages
- Page Sections
- Subsections
- Course Event Automations
Using the diagram below, we can see many of these elements in a Course's "Treeview".
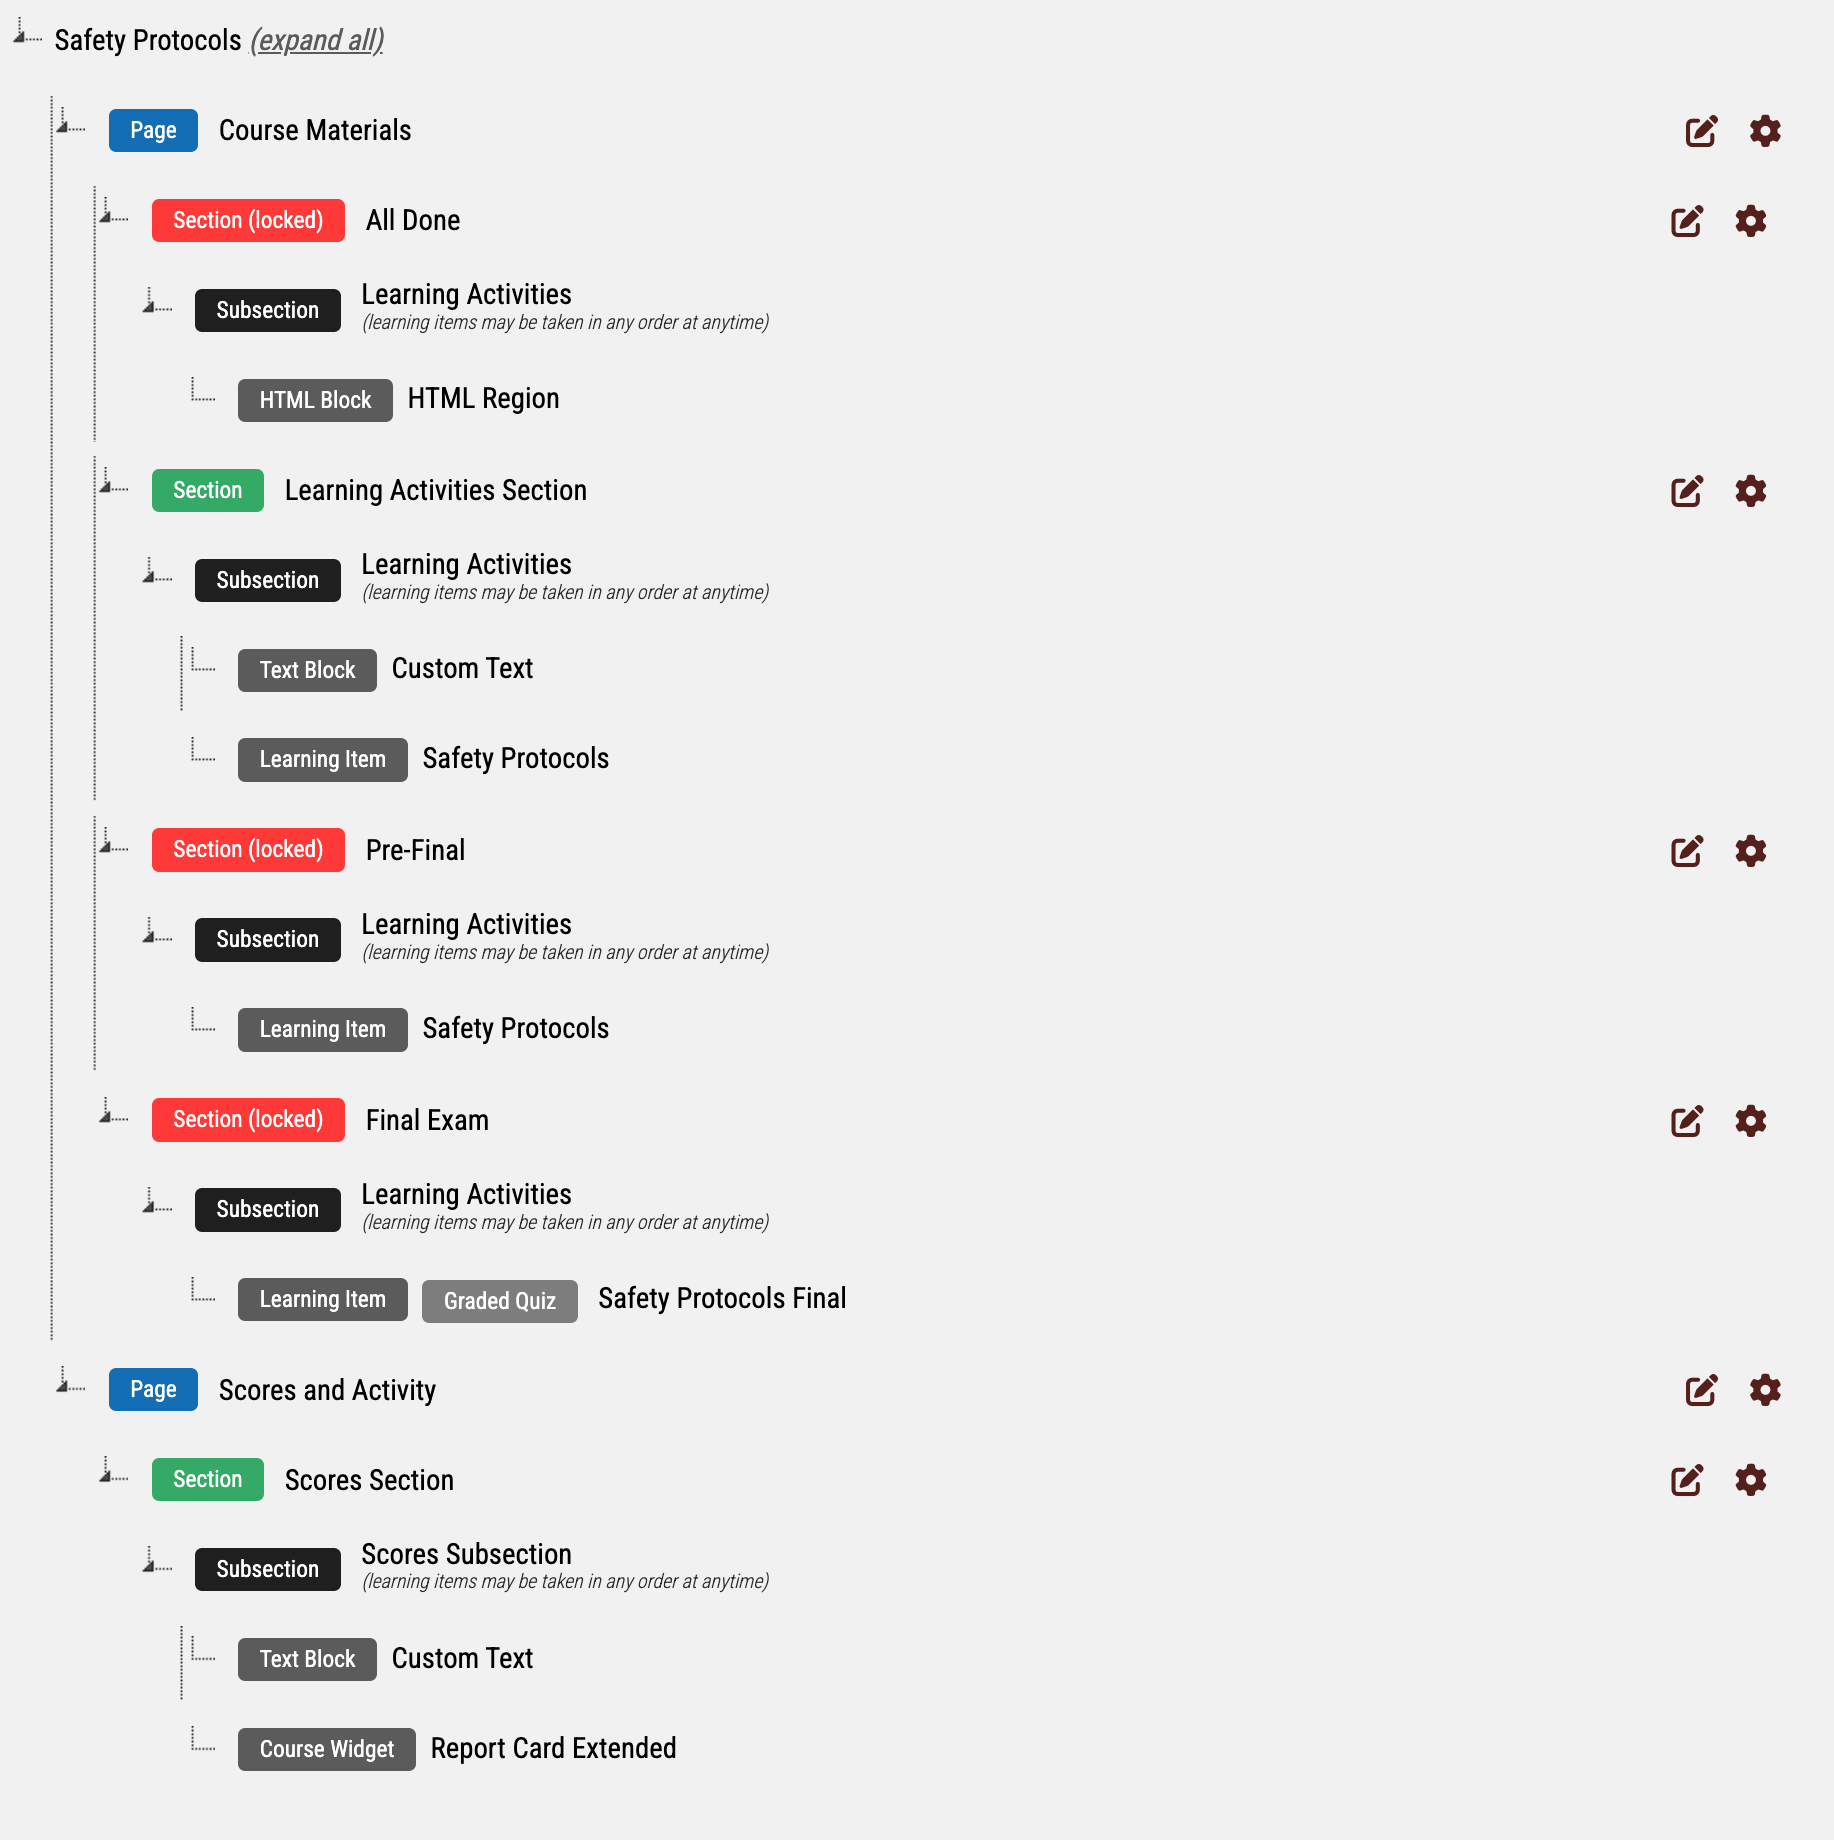
In this treeview, we can see the Course is "Safety Protocols". There are two Pages: "Course Materials" and "Scores and Activity". The first Page has four Sections: "All Done", "Learning Activities Section", "Pre-Final", and "Final Exam". Each Section has one Sub-Section, where Learning Items and other materials are displayed.
Course Pages
Every Course you create is composed of one or more Pages, and can be thought of as a miniature website. These Pages hold all the content of the Course, including your Learning Objects, SCORM files, user report cards, and links.
After you’ve created a Course, selecting the Page Manager icon will bring up a list of all the Pages the course is currently composed of. These Pages can then have their content edited, duplicated, removed, reordered, and have their Visibility Settings manipulated.
By default, all Courses are created with two content Pages: "Course Materials" and "Scores and Activity".

Selecting a Page's Settings [Cog icon], you'll be able to adjust its visibility settings. The visibility settings of Course Pages include the Page’s title, its ability to be listed in the Course's navigations, Page-specific code, and when the page is able to be seen. These settings allow you to dynamically craft your Courses, only showing if users have met certain criteria; these rules become particularly useful when used in conjunction with Event Triggers.
As an example, you may show Users from one Company certain series of Videos, while Users from another Company see a different series.

When you select the edit [pencil] icon, you’ll be brought to add, remove, and adjust the Page’s Sections.
Page Sections
A Section exists on a Course Page, and there can be an unlimited number of sections per page. Page Sections aim to accomplish two main goals:
- Hold one or more Subsections
- Use Visibility settings similar to that of a Course page
To add content to the Page Section, Edit the Section, then jump down to the Subsection area below.
If you select the Settings of a Page Section [pencil icon], you will be able to change the Section caption, hide / show Subsection captions, and add visibility requirements (examples - from a certain company, have been inside the course for 7 days or more, have a high enough average and progress, etc); again, these rules become particularly useful when used in conjunction with Event Triggers.
Subsections
Subsections are where the content of your course is added and exist within a Section. There can be an unlimited number of subsections inside each section. A subsection's primary functions are to
- Hold content, such as learning activities, links, documents, data, images, etc
- Enforce access rules for learning activities
Holding content is the most important job of a Subsection. To add content to a subsection you are able to drag in files, Create new modules, or Browse your existing modules. If you wanted to add an existing learning activity to the course, begin by filtering down to the module type you would like to add (done via selecting "Graded Quiz", "Video module", etc.).
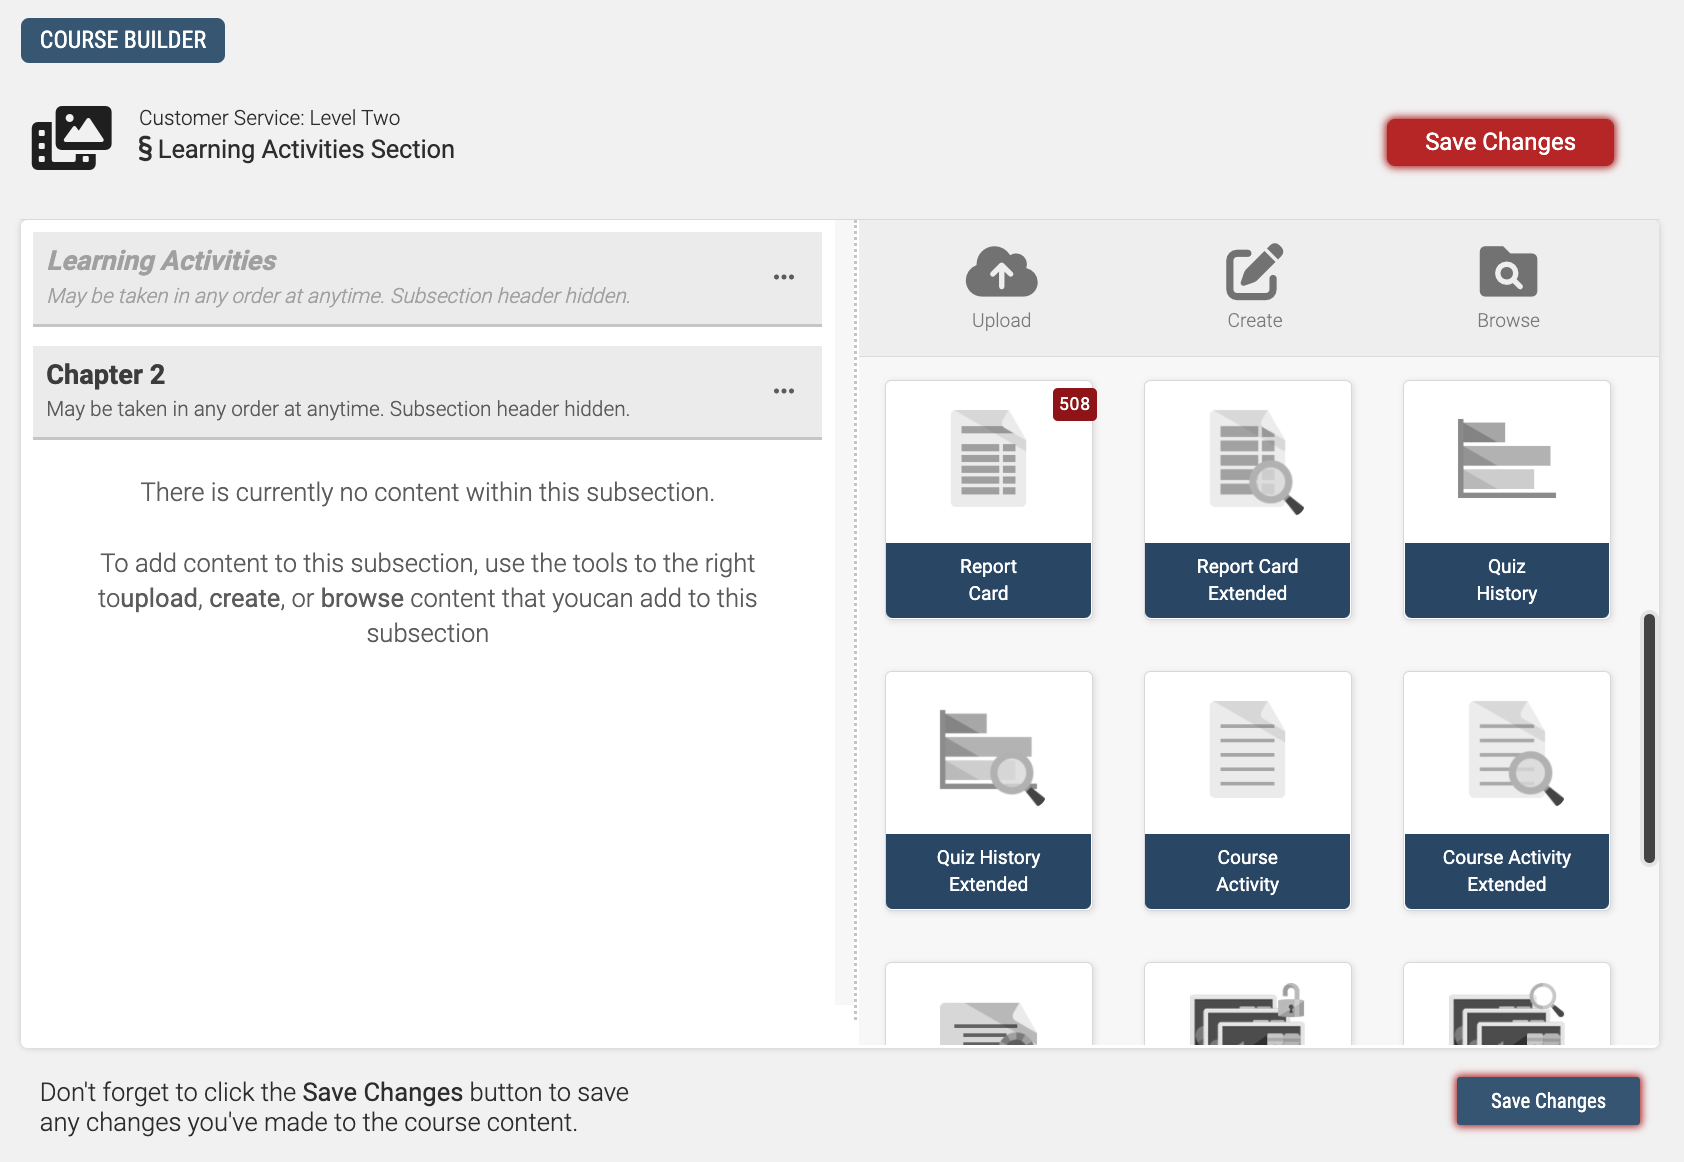
Enforcing access rules (ie: requiring users to take activities in a specific order) is a main benefit of Subsections. Using these settings allow you to dictate how the content of that subsection is going to be accessed:
- Any Order, at Any Time
- Any Order, After Previous Subsections are complete
- Any Order, After Previous Subsections are complete and passed
- Taken in Order, after Previous Subsections are complete
- Taken in Order, after Previous Subsections are complete and passed
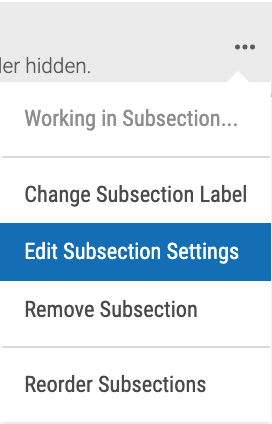
To put these settings into place, select the ? next to a Subsection name, and select Edit Subsection Settings. A dropdown will appear which lets you select which method you want to use to deliver your content.
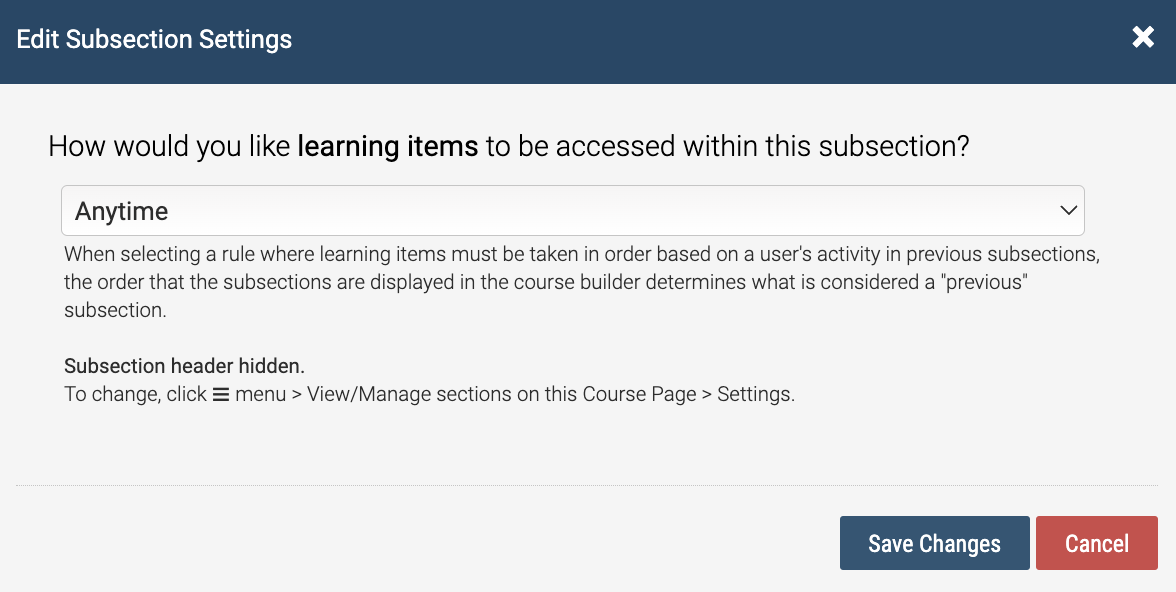
The Subsection settings can help with scenarios such as requiring a Survey to be completed, or making sure that content is accessed in an intelligent order.
Event Triggers
While Event Triggers may not directly interact with how content is accessed, it is a powerful tool that opens up a huge amount of possibilities of both in course and cross-course accessibility.
Event Triggers are added into Course from the Course Dashboard. Select the User Event Triggers button to pull up a list of your existing Event Triggers, and create new ones. It’s important to remember that event triggers are all user driven - only actions performed by users can force an event trigger to fire.
When you create an Event trigger, you can choose different actions you want to Fire the event, and what will happen when it fires - a Cause and Effect scenario. You can read more on Event Triggers here -
Hiding Based on Course Actions
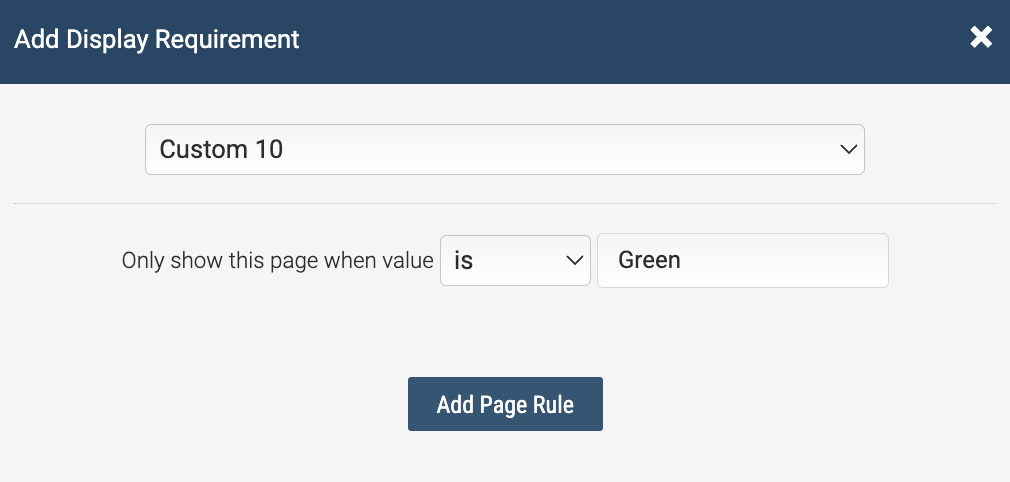
This scenario can be adjusted some depending on what you want to show or hide; but for this example, we’re going to hide a Course Page from a user until they have met some criteria - in this case, hide the page until a user PASSES a module. To do that we’ll make it so that the Course Page only shows if the user’s custom field 10 = "Green"
So we’ll first go into the Course Page’s Display settings (see Course Pages area above), and set it so that the Page only displays to the user is their Custom 10 = Green. After the setting is in place, we can test this out by logging in as a user - the page should not appear.
Next, we’re going to set up the Event Trigger. Give the Event Trigger an intelligent name, then in the top section, select when a user PASSES a certain module.
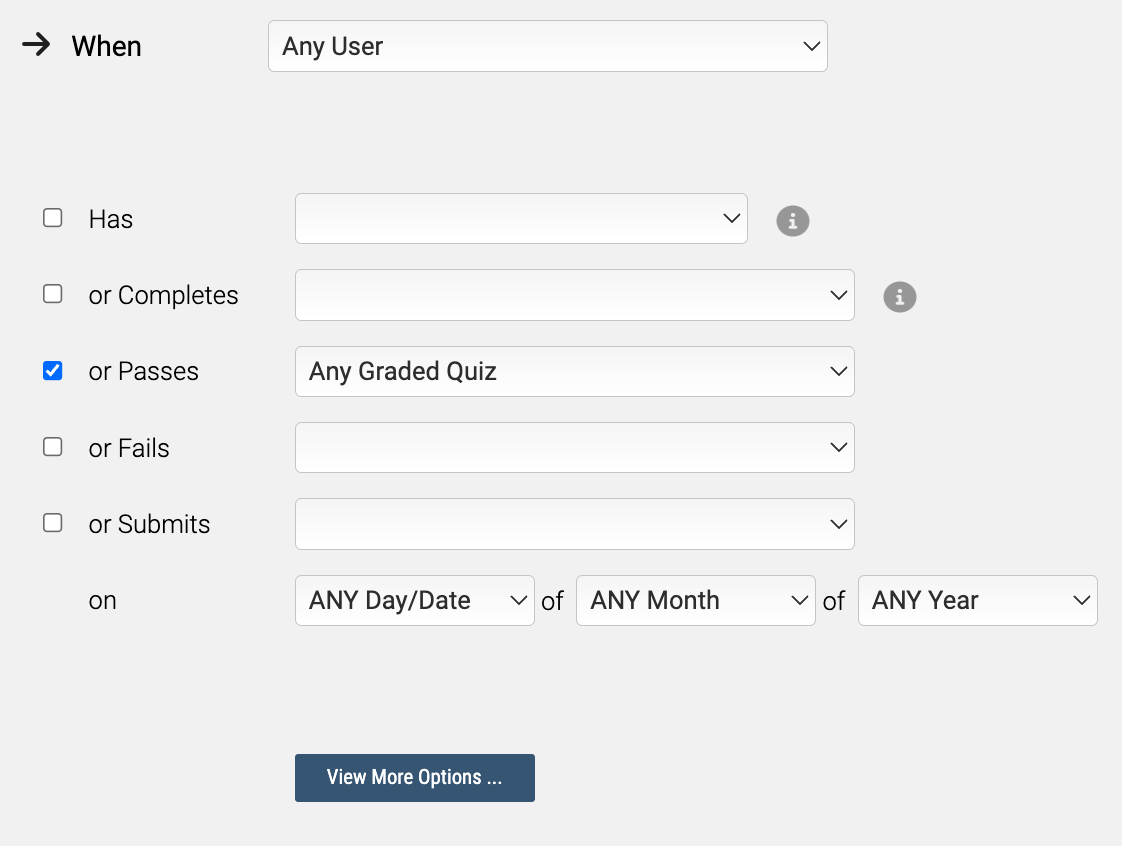
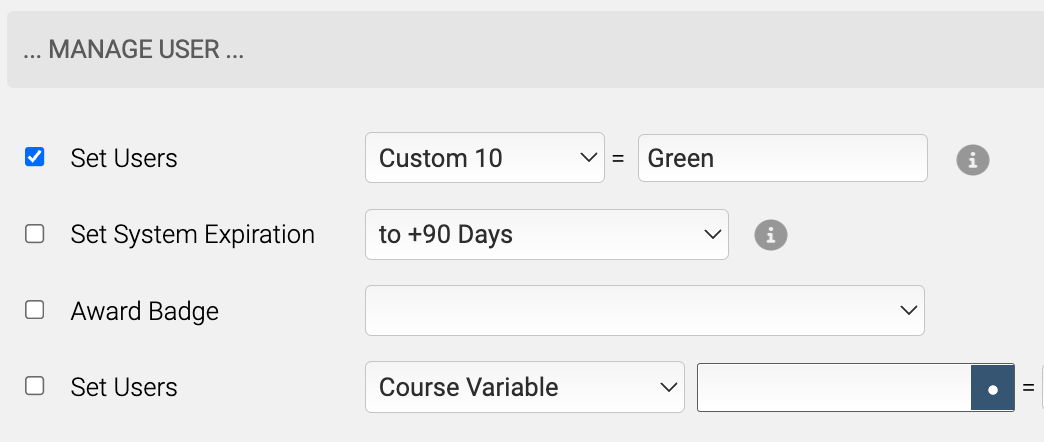
After you save your changes, you can test it out by PASSING the module as a user.
By using colors for Custom 10, I am also able to set up an inverse scenario; so that if a user fails, set it to Red, and a different page would appear to the user.
Once complete, users will have access to the one of the page(s) depending on if they pass or fail that quiz. This is a generic example of how you can use the Course Triggers to create dynamic courses.
Hiding Based on Shopping Cart Actions
Page and Section settings, when combine with the Shopping Cart, opens up a whole new way of gating content.
For this scenario, you will need to create an offline products and work with either Course Page settings, or Section settings.
First, create a usergroup named "Paid Users" (or something similar). Next, on the Sections and Pages you determine, set a Display Requirement so that they only appear to "Paid Users". After you save your changes, that portion of your course will only be accessible to users who are part of the "Paid Users" user group.
Now you just need to get users into the "Paid Users" Usergroup - when creating an offline product, you have the opportunity to create the facsimile of an Event Trigger; the difference being that this "trigger" goes off when a user purchases the Offline Product.
Now, when a user purchases the offline product, they will be added to the PAID USERS usergroup, which will allow the user to see the paid areas of your course.
This can be used for creating different payment tiers, hiding the Course Certificate, or as a way for visitors to see a "demo" version of the course, before buying the rest.
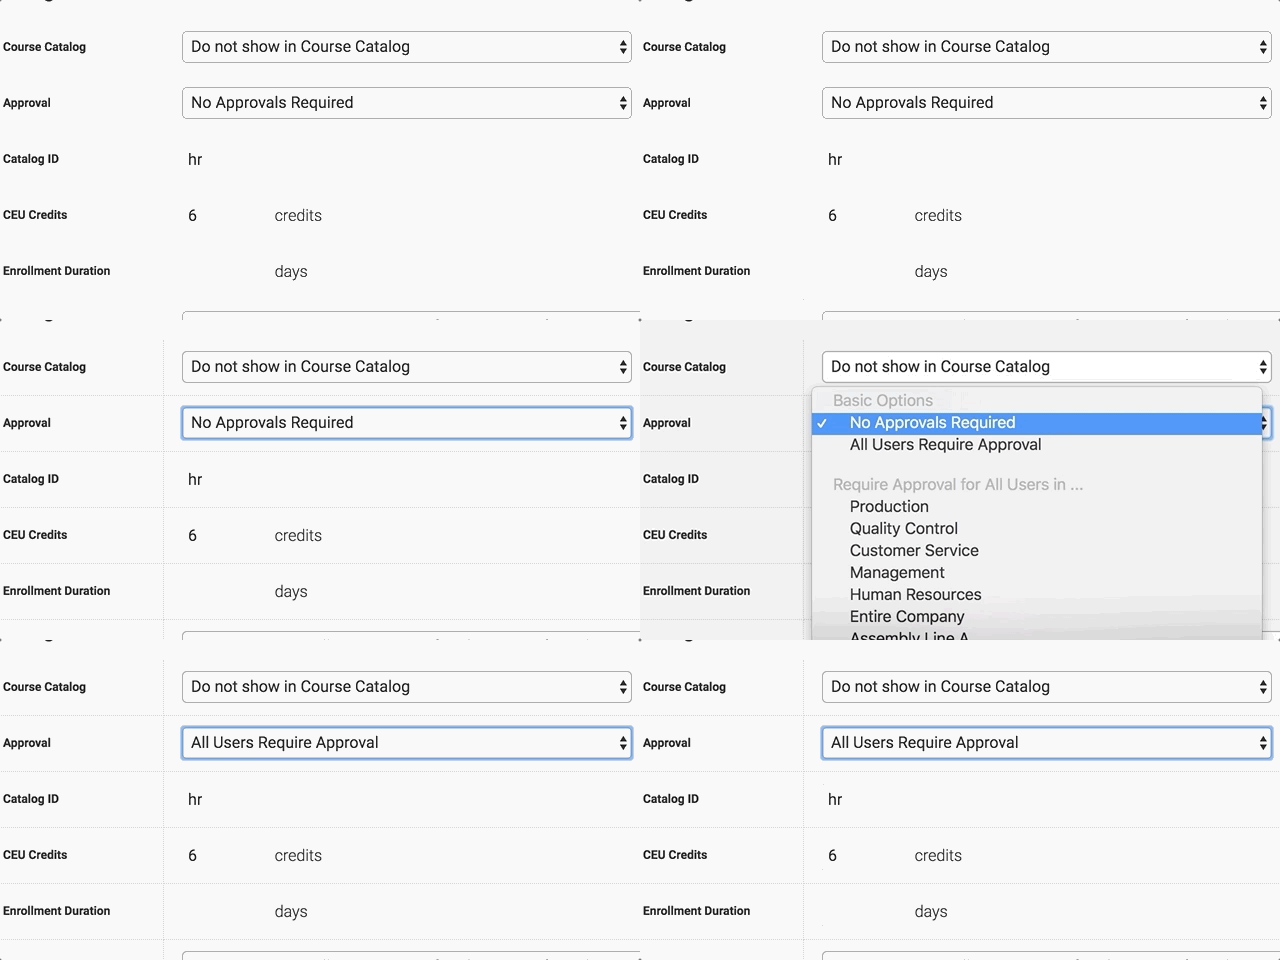
Requiring Management Permission
Requiring Answers
Requiring Answers is something that is much more specific to Graded Quizzes (see this article), but by using a Graded Quiz in your Course, you can make sure that your users are required to answer every question before progressing in their courses.
Open up a Graded Quiz’s settings, then select the "Require Answers" dropdown.
From the Course perspective, make sure that your Subsection is set to "Taken In Order, After Previous Subsection Items are Completed".