Creating a Certification Program in Axis LMS

In Axis LMS, Certifications and CEUs are a method to combine your otherwise independent created courses and ILT Programs into a larger, more tangible program for your users to complete and progress through. They also offer the advantage of being able to award your users a renewing certification, if you choose to.


While inside of your Talent tab, select Certifications & CEUs to begin creating and managing Certification Programs,


Do You Need to Use CEUs?
 
Before beginning, you'll want to consider whether or not CEUs is a match for your system. Using CEUs gives users options when selecting what courses to complete towards earning a Certification. If your users are on a set path, you may be able to skip the CEU aspect entirely.
 
If you are using CEUs, there's a few steps you'll want to follow before jumping into Certification Programs:
  1. Assign CEU Credits to your existing Courses
  2. Create CEU Course Groups from your Courses with assigned CEU Values
Assign CEU Credits to your Courses

 
The first step to creating Certification Programs is assigning CEU values to your different Courses. Inside Axis LMS, each Course will carry the same CEU weight for every Certification Program it is present in.
 
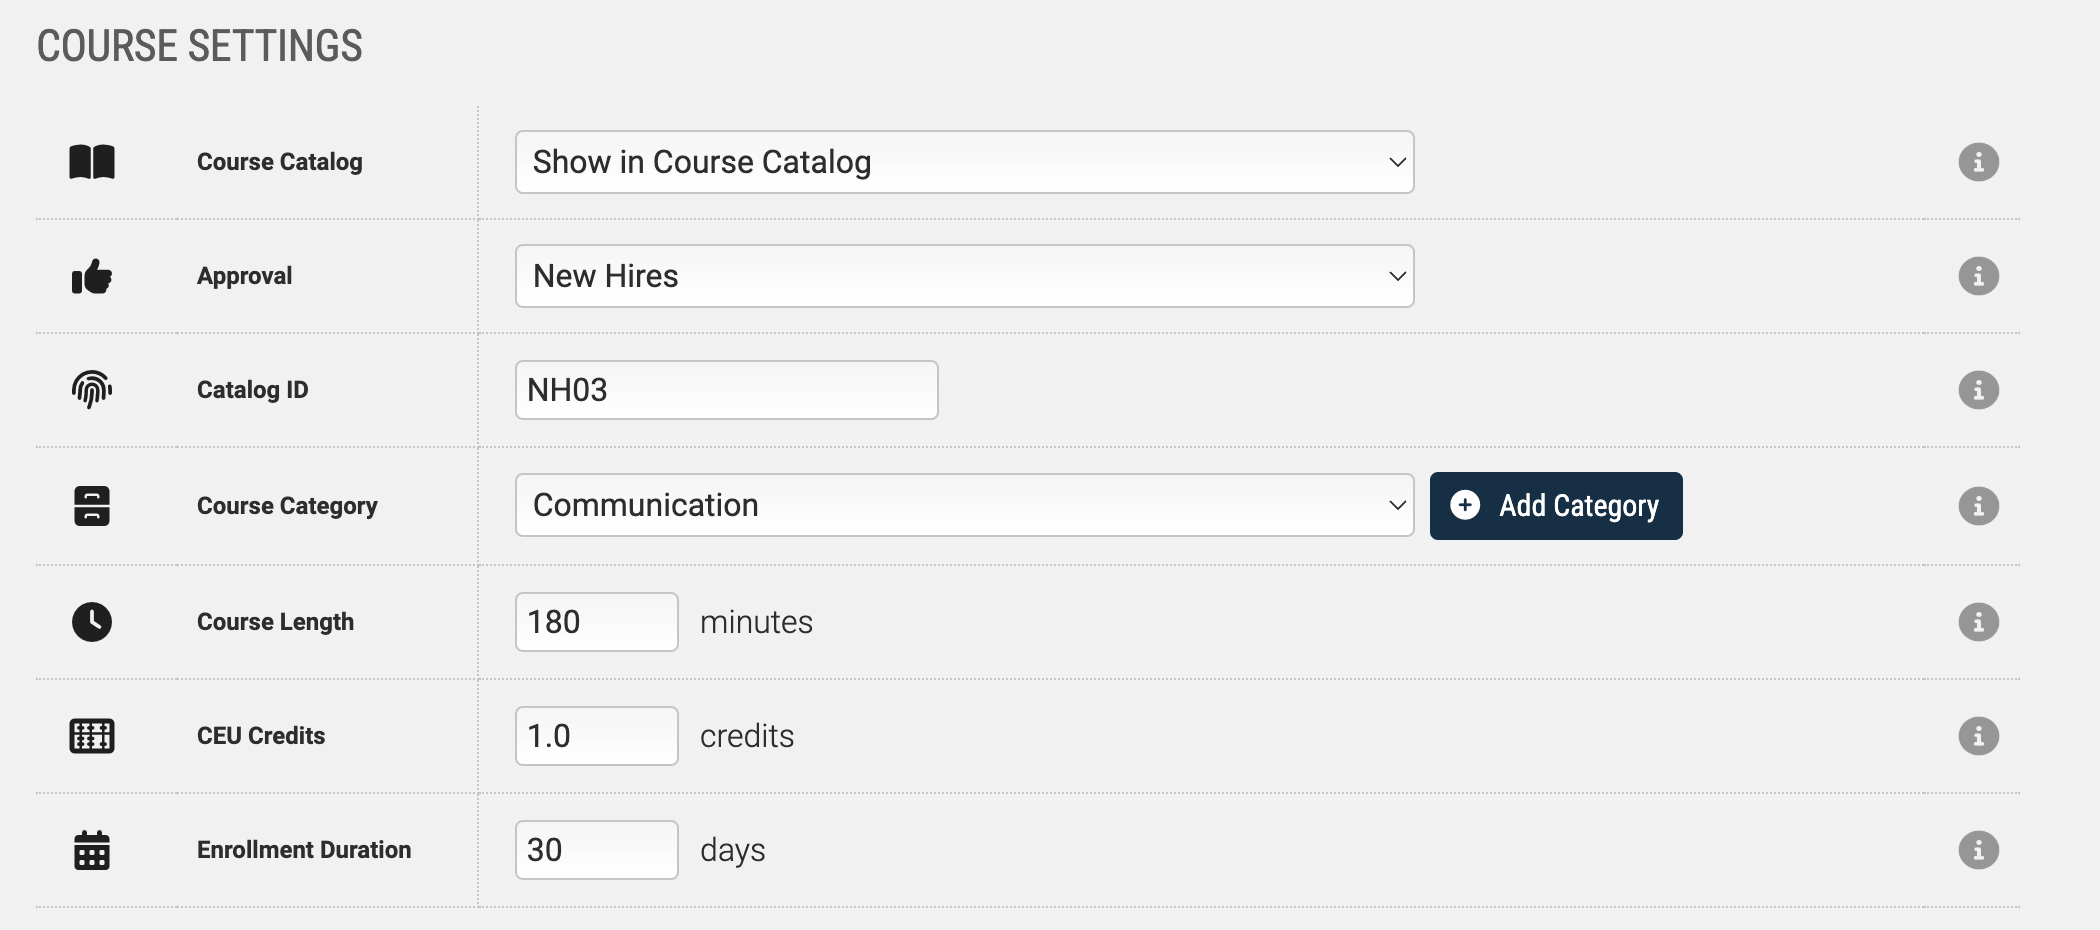
To assign CEU Values to your Courses, open up your Learning Tab, and navigate down into one of your Courses. Select the Settings icon, then look for the CEU value. Save your changes after submitting a value, and your Course is now eligible to be used within CEU Course Groups.


CEU Course Groups

CEU Groups are groups of one or more courses that are capable of being used in Certification Programs. When creating your Certification Programs, you will assign one or more Course Groups to that program. Any courses completed from within those groups will contribute towards a Certification Program’s Recertification Requirements; once the user has met or exceeded that requirement, the user will be recertified automatically.
 
Perhaps the best usage case for why Certifications are composed of Course Groups rather than individual Courses is when retiring or adding new Courses. Because Course Groups can be used in any of the Certification Programs you create, when a course is removed, or a new course is created, you only need to make your changes in one place, rather than adding and removing in every Program you’ve created.
 
How to Create Course Groups
    Learning > Online Courses > Work with Course Groups > CEU Groups > Add a Group
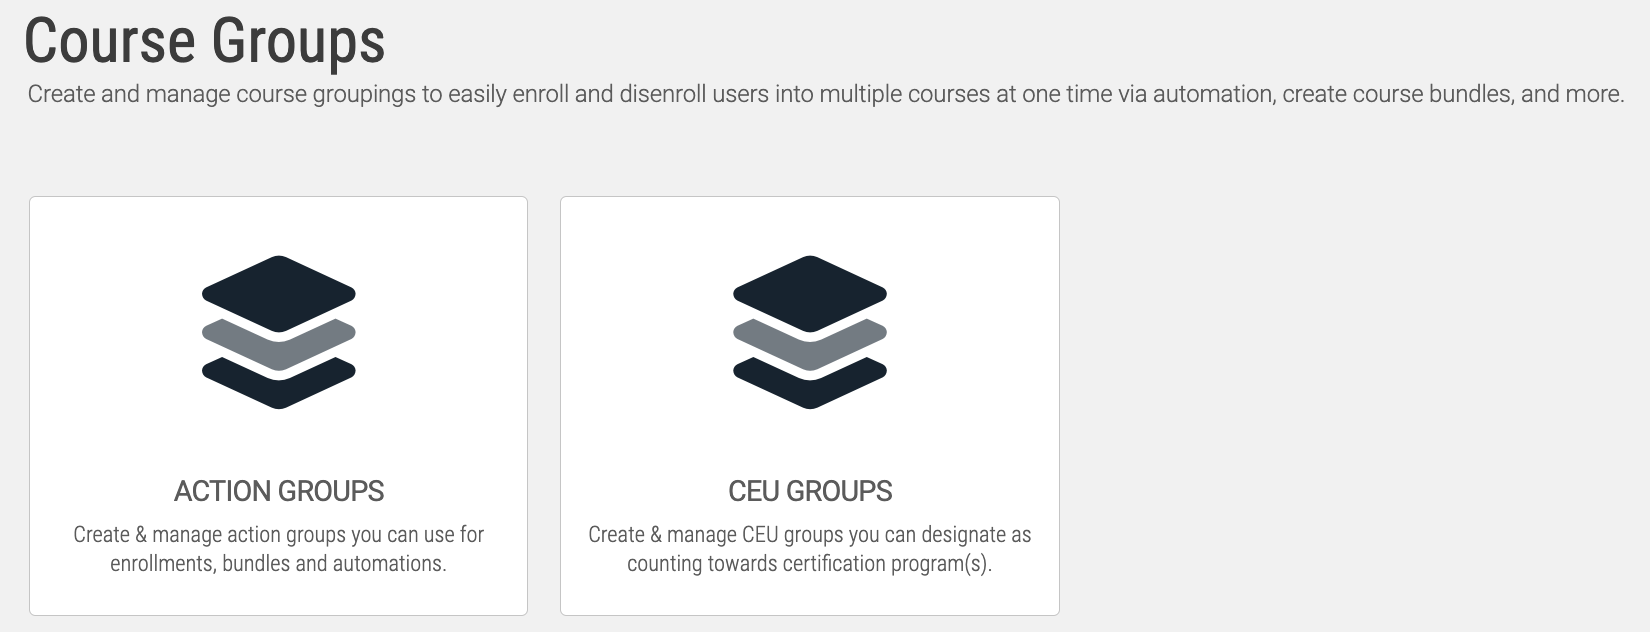

After you’ve associated a CEU value with your courses, those courses can now be added into CEU Groups. To add a New CEU group, open your Learning tab, select Online Courses, next select Work with Course Groups, then begin Managing your CEU Groups.

Selecting Add a CEU Group will bring you to a new page, where you’ll be prompted to fill out some different fields.


The CEU Group Name is how this group of courses will appear when you’re creating your Certification Programs. You’ll want to make sure the name has some meaning to you, as this is an admin-facing identifier; users will not see this.

The Description is an optional admin-facing field as well. This field is particularly useful for admins who will create their Certification Programs, then go a long span of time without touching it again. By entering an intelligent description, admins can take these long breaks, and be able to open the CEU groups back up without struggling to remember what they were thinking at the time. "This group should contain no more than 8 CEU credits, and should be required to achieve the CPR certification (12 CEUs)
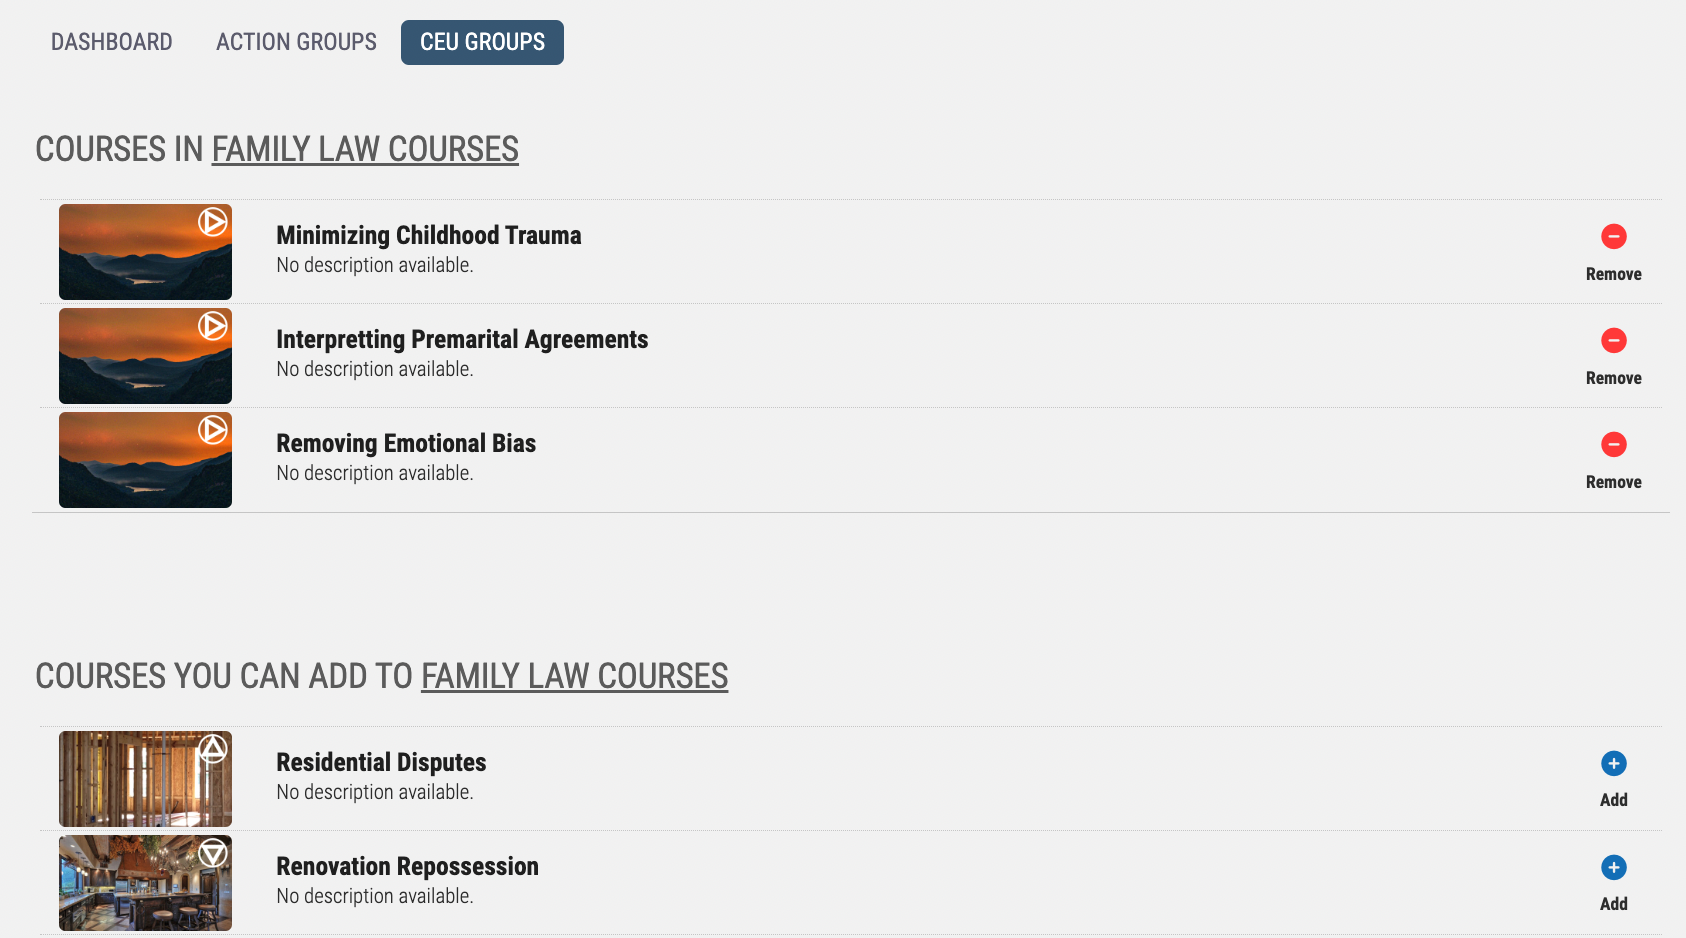
 
 
The most important aspect of creating your groups is what courses are represented in that group. Once you have created your group, select the Courses icon next to that group to manage the courses that are in that group. You are able to see which courses are apart of the CEU Group and which courses you are able to add to that group.
 
A Course can also be added to CEU Groups from its Dashboard. Selecting the Course Groups icon you can see what CEU Groups that course is a part of, and what groups you can add it to. If an inactive Course was part of a CEU Group, users who have already completed that course will retain their credits; but no new users will be able to access the course.
 

After creating several CEU Course Groups, you’re ready to start using them in your Certification Programs.

How to Create a Certification Program
    Talent > Certifications & CEUs > Certification Programs
Certification Programs are created from inside your Certifications & CEUs area, then Managing your Certifications. Selecting Add a New Certification Program will prompt you to give the Program a name; and optionally, a Program ID.

Program Dashboard

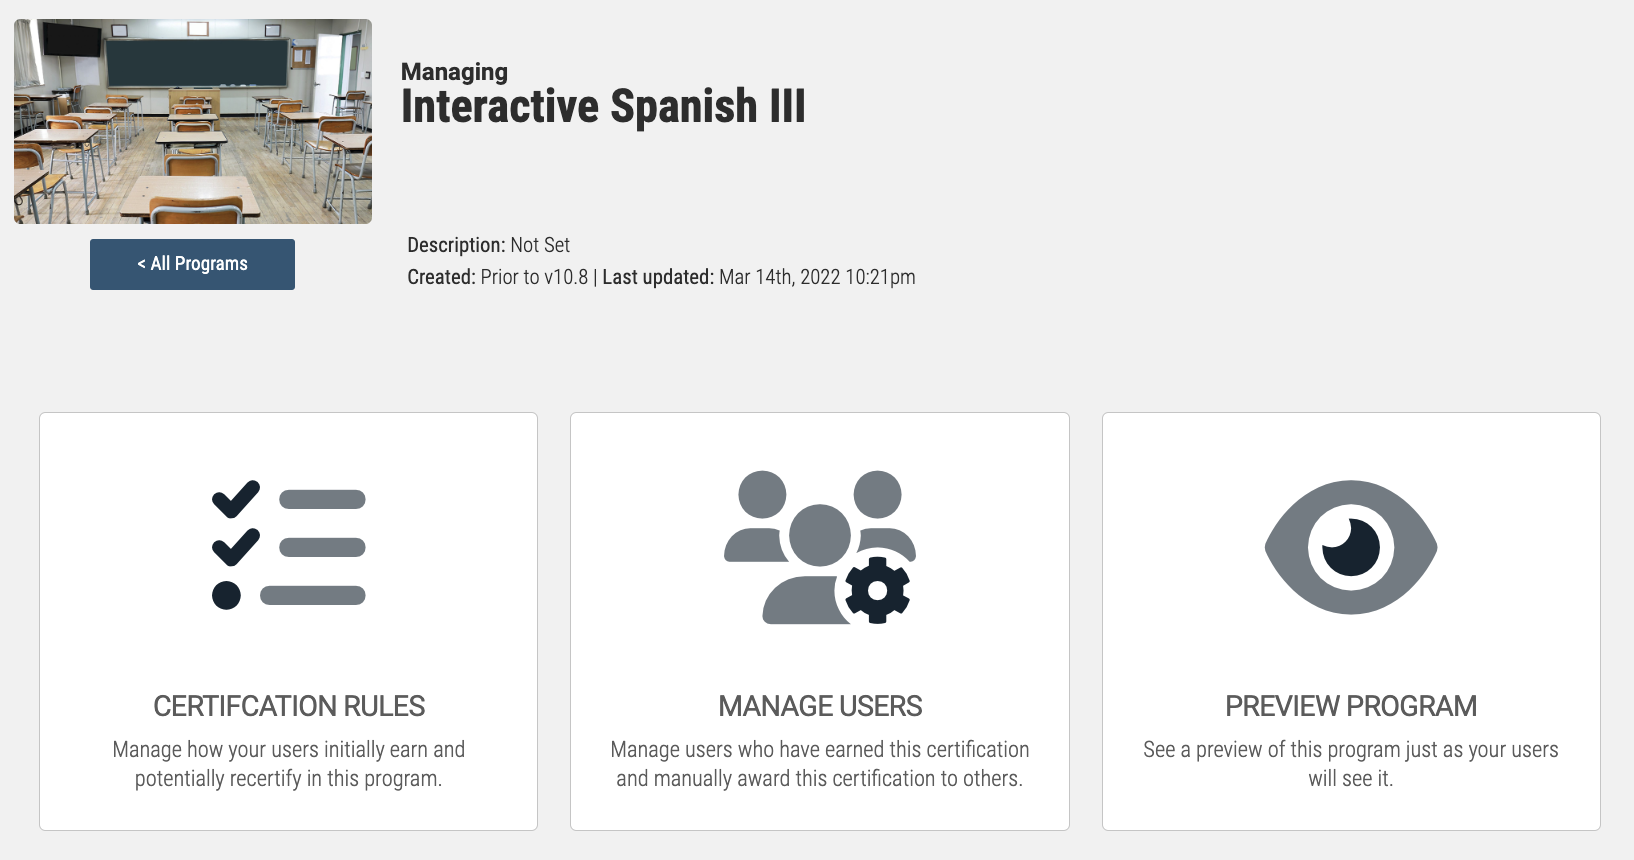
When you first create the Program, you'll be prompted to take one of three actions; for the most seamless transition, the next logical step is the Program's Certification Rules - this is where the logical of the Certification is established.
 
Alternatively, managing the Certification Program itself will take you to the screen below; this is the Certification Dashboard. From here you can manage how the Certification is Awarded, who has the Certification, and Preview the Program page; among many other things.


Certification Rules

The backbone of your Program is the Certification distribution, and Axis LMS does not slack in the options available. Selecting Certification Rules, you'll see a list of every scenario a user can encounter to either be awarded, or recertified via this Program. Both scenarios (initial earning, and re-certification) can be achieved multiple way; for different amounts of time; and with different recertification periods depending on how you dictate.
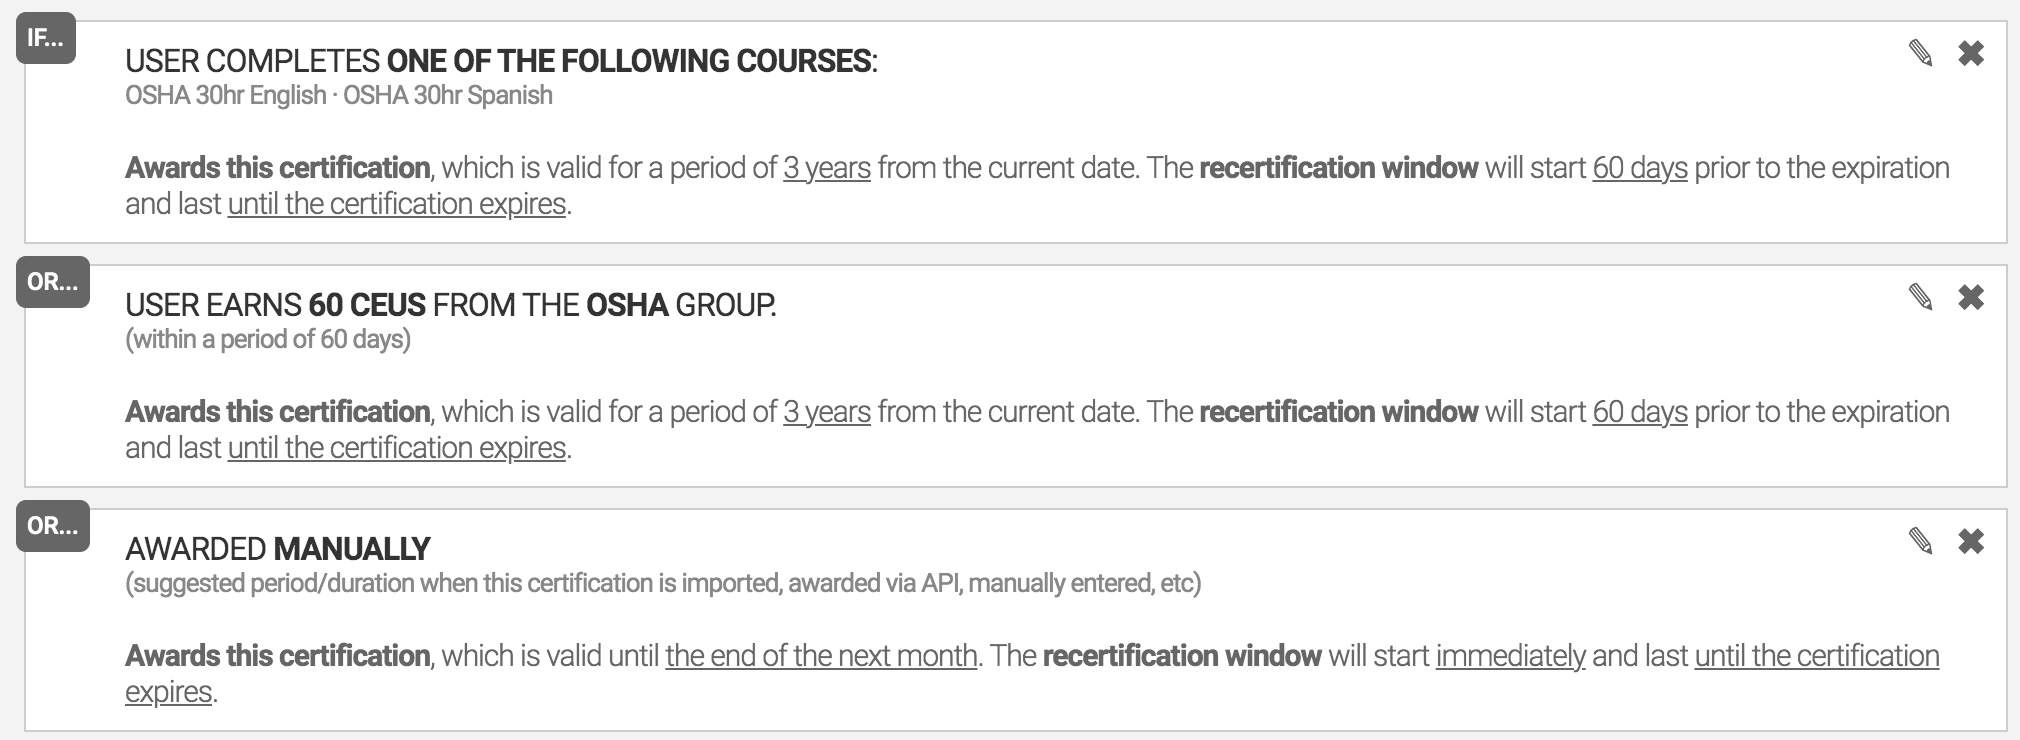

In the image above, a user can earn their initial Certification for this Program in one of three different ways. In this example, regardless of how they earned this Certification, the Certification is valid for 3 years. In this example, the 'intended' acquisition method is presumably though completion of a specific course, or earning CEUs from a specific group. But if the admin dictates they should have the Certification (or just needs more time to investigate the user's credentials).
 
Re-certifying in the Program has very similar options, but for different lengths of time. Depending on the Re-certification method, the user's new certification would be good for 1, 2, or 3 years.
 

Creating your Certification Rules

If you've not yet created any for your Program, Add a New Rule for Initial Certification - this will slide in a Rule Creation Wizard. Begin by choosing how this rule is checked: Passing a Course, Earning CEUs, or Manually awarding. Depending on the option selected, fill out any additional requested information by checking the relevant Courses, or CEU Groups.
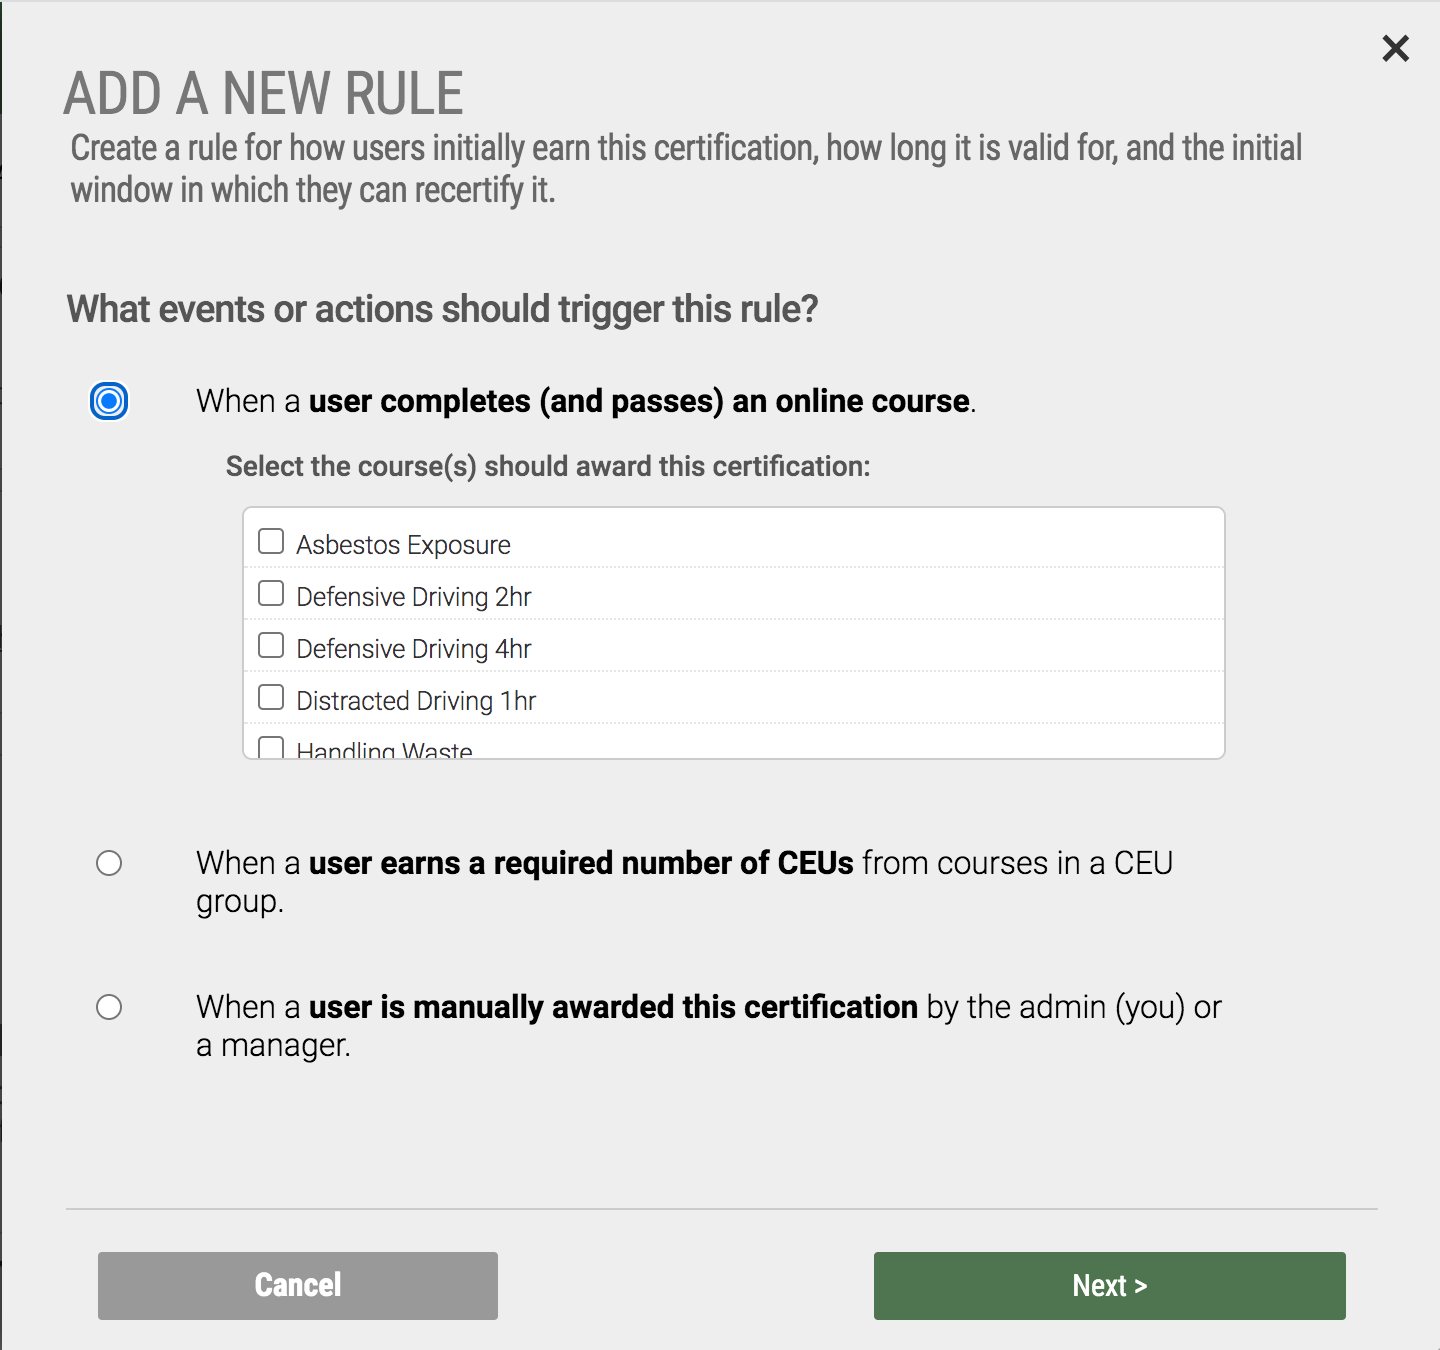
 
After choosing how the Certification is awarded, click the Next button at the bottom of the page. Now you'll be prompted to choose how long this Certification is valid for *when earned in this method* - remember, you can choose to have the Certification awarded multiple ways; and those can all award for different durations. If you choose to have the Certification expire, you will be further prompted to select when users are eligible to begin re-certifying - either immediately, or any number of days before the Certification expires.
 
After filling out the last fields, save your Rule - it will appear at the bottom of your Rule listing. If you want to add additional rules, click the Add a New Rule button and continue adding. If users can recertify this Certification, consider Adding a New Rule for Recertification as well.

Program Interface

Much like Instructor Led Training, Certification Programs also have their own User Interface. From the UI, users can potentially see courses that will advance their progress in their certification; their Program's Certificate; and different resources you've associated with the Program.
 
Much of this can be managed through the Program's Branding & Design area. Selecting this tile will bring you to a page where you can set the Program's Banner and Thumbnail; further down the page, you can change the user-facing description, and change it up depending on if the user viewing the page is certified already or not. Towards the bottom of the Branding & Design, you can change what courses (if any) are displayed to the user from within the Program. The 2nd and 3rd options allow users to either enroll, or purchase, courses associated with the Program which will advance their progress towards (re)certification.
 
After making your changes, you can return to Manage the Program, and Preview it from the Program's Dashboard to see your changes.


The User View provides the users with a tangible method of interacting and knowing how to progress their Certification, as well as providing basic information about their certificate specifically (cert number, when they can recertify, and an ability to view/print their certificate). If you've chosen to show users courses associated with the Program, a new tab will appear for the user, taking them to a listing of those courses.
 
And if you've attached any files to the Program through the Program's Linked Resources, another page will also be available.*
    When adding Linked Resources, you may toggle on/off the page to only show to users who have already earned the certification.
User Management

When Managing your Users from a Certification Program dashboard, you can quickly Award, Edit, or Revoke Certifications to users. Or, you can quickly pull up a list of all Users who are Certified.
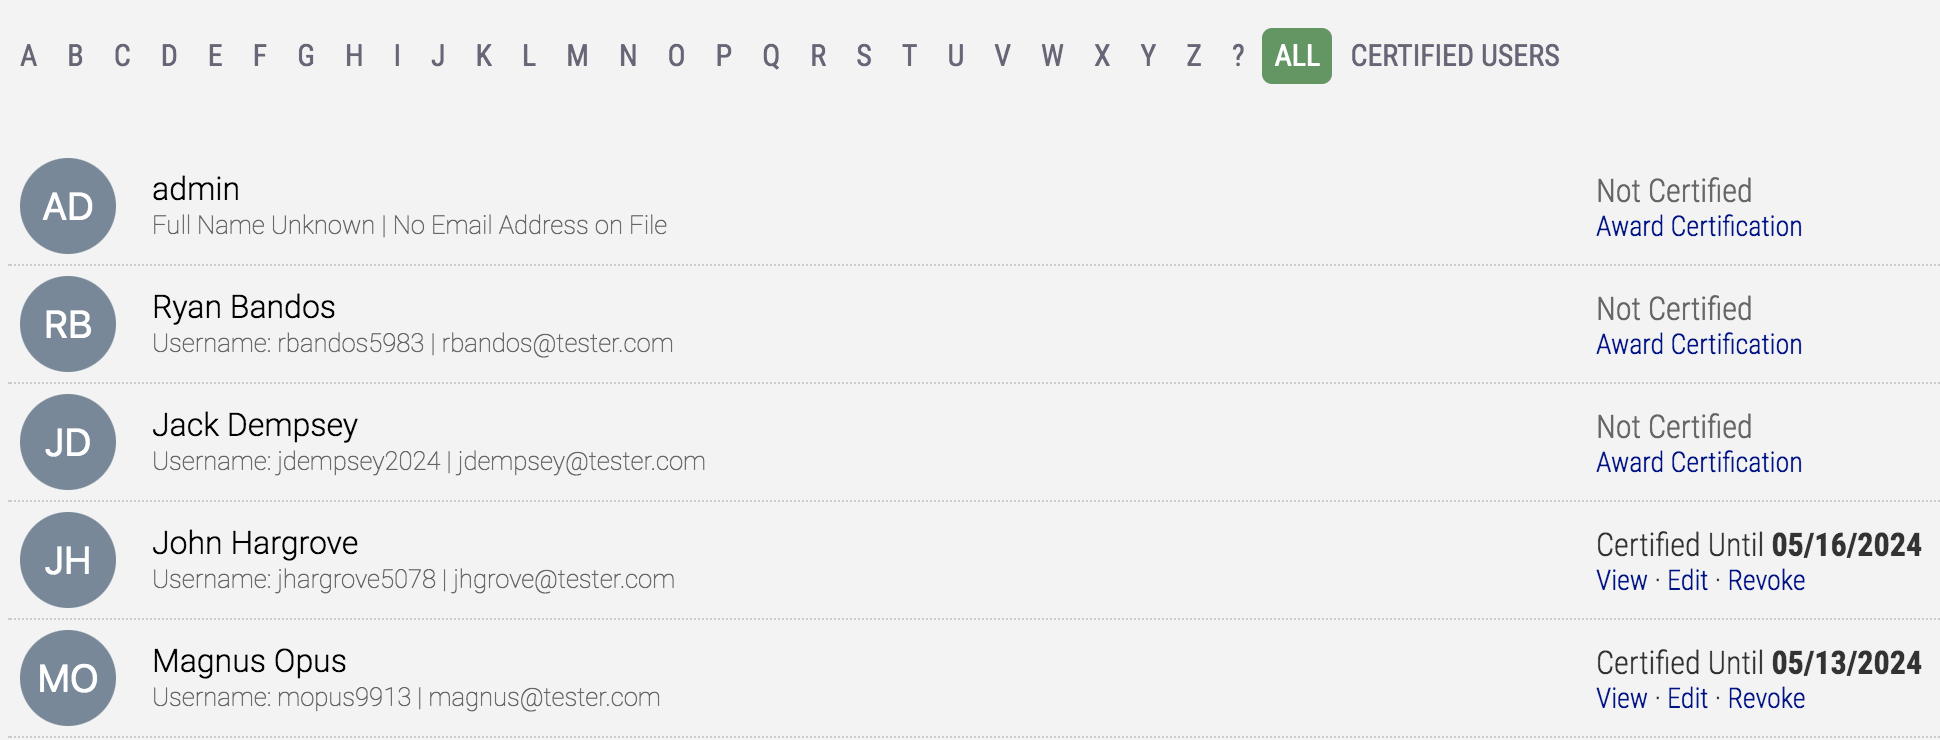

When Awarding a Certification to a User, the LMS will first to use settings which match up to any rules pivoting off of "Manually Awarding". If none are found, it will use its own default (though you can certainly edit this as needed).

Editing a Certification allows you to change the Certification Number, when it was earned, if it needs to be renewed, and when the Recertification window should being and end.

Revoking a Certification **cannot be undone**. You will receive a 2nd prompt before completely revoking the Certification for a user, but this is a permanent action; and while it can be manually re-awarded, you may have a frustrated user on your hands because of this.

Email Settings

Similar to other emails inside Axis LMS, the Expiration Email will send out automatically when its requirements are met. Up to three emails will be sent out, all pivoting off of users’ certification expiration dates. When the date is a match, an email will be sent using the Email template below the reminder dropdowns.

This email template also uses some Certification specific placeholders, such as Certification Expiration date, and the user’s Certification Number.